Discover Flaws Before They Become Failures
Using powerful sound waves, our experts detect invisible cracks or weaknesses in materials.
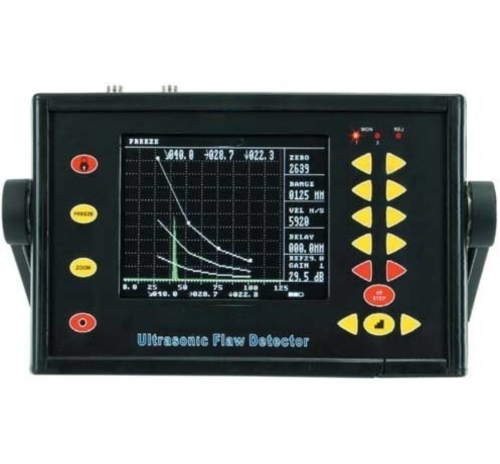
Ultrasonic Testing (UT) uses high-frequency sound waves (ultrasound) that are above the range of human hearing to measure geometric and physical properties of materials, and flaw detection/evaluation. Ultrasound travels through different materials at different speeds (velocity). The speed of sound propagation in a given material is constant. Our experts make sure this quick, non-intrusive and cost-effective inspection is also reliable with advanced testing equipment like Einstein TFT – II, Krautkramer’s and others.


Ultrasonic Thickness Measurement
The use of Ultrasonic non-destructive testing (NDT) to check material properties such as thickness measurement is used in all facets of the industry. The ability to gauge the thickness measurement of material without access to both sides of the test piece offers this technology a multitude of possible applications.
Ultrasonic thickness gauge can be set up for metals, plastics, composites, fibreglass, ceramics & glass. It is completely non-destructive with no cutting or sectioning required.
Ultrasonic thickness measurement is done by gages by precisely measuring how long it takes for a sound pulse that has been generated by a small probe called Ultrasonic Transducer to travel through a test piece & reflect back from the inside surface or for the wall.
Measurement is made from one side in “Pulse/echo” mode because sound waves reflect from boundaries between dissimilar metals. Ultrasonic thickness measurement is performed for the measurement of the thickness of Hot Metals, through coating and scale measurement of the inner surface of the pipe.
1) Measurement of Thickness through Hot Metals:
The thickness of the part can be measured in case of surface temperature reaches to 5000C. Particularly in metal, there may be instances when the thickness of the part needs to be measured during the going process where the test piece cannot be cooled down.
Measurement of thickness is performed on one side of the part just as the measurement at normal temperature.
2) Measurement of Thickness through Coat/Paints:
The petrochemical industry used a network of pipes to transfer liquid and gases. These pipes are chemically coated or painted for their safety from any hazardous effects. Change in the thickness of the pipe affects its transmission capacity as well as overall performance.
Hence it is necessary to measure the remaining thickness of a metal pipe or any other metal in the industry subject to corrosion through one or more coats of paints or similar non-metallic coatings. This presence of paint or similar coatings will cause measurement errors with conventional ultrasonic thickness gages.
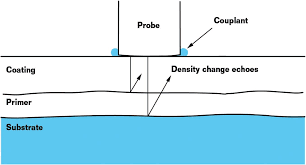
The paint has a much slower sound velocity. Such measurement of the thickness of coated metal can be done in two ways; Echo-to-Echo measurement and THRU-COAT measurement.
Echo-to-Echo thickness measurement involves the technique of timing the interval between two successive back wall echoes that represent successive round trips of the sound wave through the test material. In painted metal, these multiple back wall echoes occur only within the metal, not in the coating, so the interval between any pair of them (back wall echo 1 to 2, back wall echo 2 to 3 etc.) represents metal thickness only with the coating thickness cancelled out.
THRU-COAT measurement was used to identify the time interval represented by one round trip in the coating. That time interval is used to calculate and display the coating thickness, and by subtracting that interval from the total measurement the gage can also calculate and display the metal substrate thickness.


3) Measurement of Scale Thickness:
The formation of scale on the inner surface of pipes has become a major problem for various industrial plants because it may lead to large production losses. In the electric utility industry, a metallurgical technique for measuring thickness is employed to predict the remaining life of high-pressure boiler pipes. The metallurgical technique provides a very accurate measure of scale thickness.
Disadvantages of metallurgical measurement;
Discover Flaws Before They Become Failures
Using powerful sound waves, our experts detect invisible cracks or weaknesses in materials.
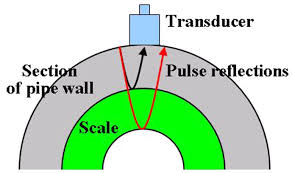
In this technique, an ultrasonic transducer on the outer surface of the pipe transmits and receives ultrasonic energy at its resonance frequency. The ultrasonic energy from the transducer enters the pipe and travels until it reaches the inner surface of the empty pipe where it is mostly reflected back toward the transducer. When the scale is present on the inner surface of the pipe, some of this energy is not reflected back, but rather is transmitted into the scale.
The acoustic impedance mismatch between the pipe and the scale causes the ultrasonic energy to be reflected. The amplitude of the reflected signal is associated with the impedance ratio between the two materials. It increases with a greater impedance ratio. Similarly, a reflection occurs at the interface of the scale and the fluid within the pipe. The time of flight (roundtrip time) of a pulse within the scale can be determined by measuring the times of flight to the pipe/scale and the scale/fluid interfaces.
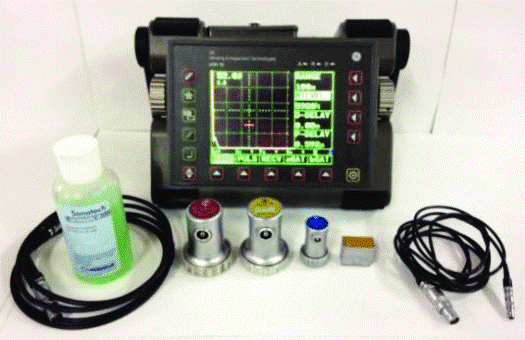
The equipment used for Through Coat & High Temperature (Up to 500 C) thickness measurement are,